Leave Your Message

How to Choose the Best Attachments for Excavators

Choosing the right excavator attachment can transform a slow job into a controlled, productive operation. Attachments For Excavators should match the machine’s weight, hydraulic capacity, and working environment. A compact excavator may handle a narrow trenching bucket well, but it could struggle with a heavy breaker. That mismatch wastes fuel and increases wear.

Real job conditions matter more than impressive product photographs. Consider the soil, trench width, material density, and required digging depth. A grading bucket suits final shaping, while a hydraulic thumb improves control when moving logs, rocks, or demolition debris. For frozen ground, a breaker may be practical, but its impact settings must follow the manufacturer’s specifications. I have seen operators choose attachments by price alone. The cheapest option rarely remains cheap after poor productivity and repairs.

Reliable selection also requires checking the coupler, pin dimensions, auxiliary flow, and machine lifting limits. Ask the dealer for verified performance data, not vague claims. Review the excavator manual and attachment documentation before installation. A trained technician can identify pressure problems that are invisible during a quick inspection. Small details matter.

There is no perfect attachment.

The best choice balances performance, safety, maintenance, and total operating cost. Keep a simple record of fuel use, cycle times, attachment damage, and operator feedback. That information may reveal that a familiar attachment is not the most efficient one. Conditions change between sites, so selection should remain practical and willing to improve. With careful evaluation, operators can use Attachments For Excavators more effectively and protect both equipment and project schedules.
How to Choose the Best Attachments for Excavators

Excavator Attachments and Their Main Functions

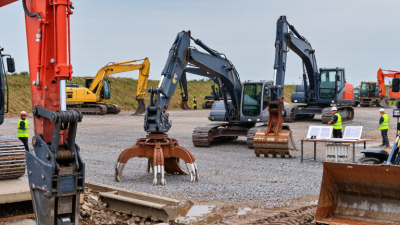
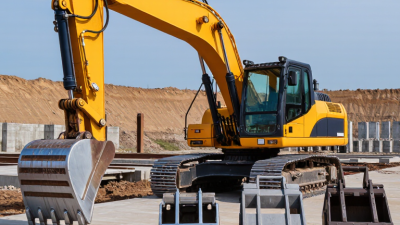
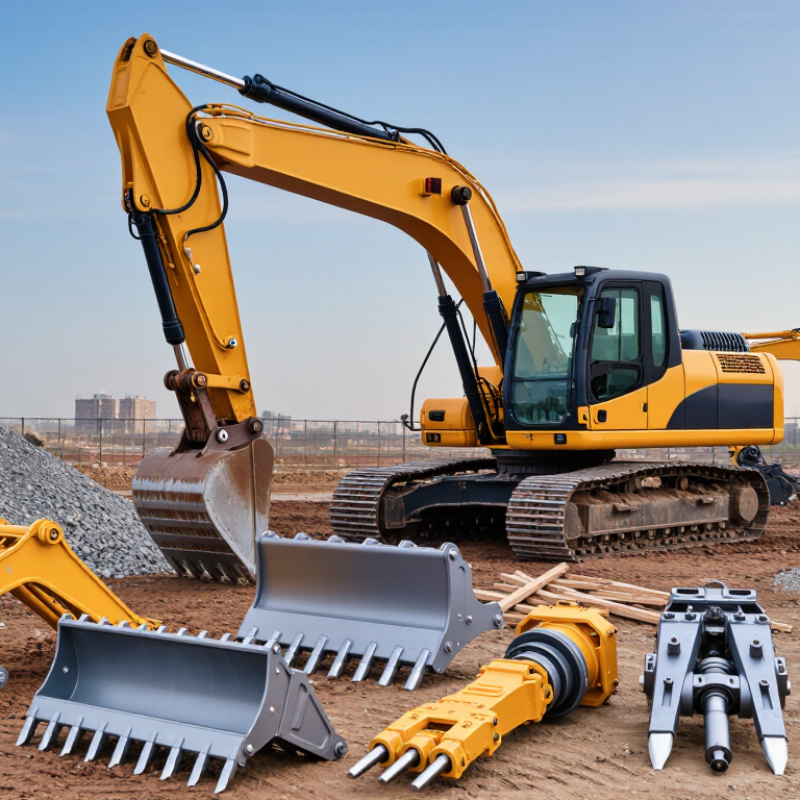
Choosing an excavator attachment starts with the task, not the machine’s advertised power. A digging bucket removes soil and loads spoil, while a grading bucket shapes slopes and drainage channels. A hydraulic breaker fractures concrete and rock; a grapple sorts timber, scrap, or demolition debris. Augers create consistent holes for posts and foundations. Shears cut steel, but they require stable hydraulic flow and careful positioning.

Market data supports this wider attachment strategy. Grand View Research valued the global excavator market at about USD 63.7 billion in 2023, showing the scale of equipment investment. The Association of Equipment Manufacturers also reports strong demand for compact construction equipment in recent years. That trend makes quick-change attachments practical for smaller contractors.

Still, compatibility is easy to underestimate. Check operating weight, hydraulic pressure, flow rate, pin dimensions, and recommended application before purchase. A powerful breaker can damage an undersized carrier.

Field experience suggests matching the attachment to the material’s resistance and the site’s access. A narrow trench bucket saves effort in crowded utility work. A tilt bucket improves finish quality on uneven ground, though it may reduce breakout force. ISO 20474-5 provides safety guidance for hydraulic excavators, including attachment-related operating considerations. Operators should inspect pins, hoses, guards, and locking systems before every shift. I would not choose from catalog photos alone. Actual soil, cycle time, and operator skill can change the best option. Metrics help, but the jobsite often exposes the uncomfortable mistake.
Matching Attachments to Excavator Size and Specifications

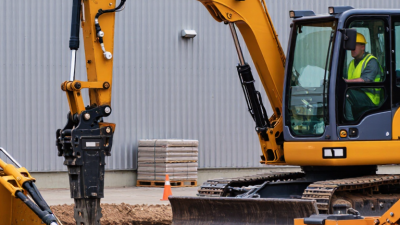
Choosing an excavator attachment starts with the machine’s operating weight, not the attachment’s appearance. A compact excavator may handle a grading bucket but struggle with a heavy breaker. Check hydraulic flow and pressure before selecting any powered tool. These figures determine whether the attachment will work efficiently or overheat the system.

Match the attachment width to the excavator’s digging force and working area. A wide bucket can improve productivity in soft soil, but it may reduce breakout performance in dense clay. Verify pin diameter, mounting dimensions, and coupler compatibility carefully. Small mismatches create movement, uneven wear, or unsafe connections. They are easy to miss.

Real work conditions matter. A breaker used on reinforced concrete needs suitable hydraulic output and enough machine stability. A tilt bucket requires enough lifting capacity at full reach, especially on sloped ground. I have seen operators choose attachments by weight alone, then discover poor balance during side digging. That assumption needs review. The rated lift chart, counterweight, boom length, and auxiliary circuit should be checked together. Manufacturer specifications and inspection records provide more reliable guidance than guesswork. Before delivery, test the attachment at low engine speed and inspect hoses, pins, and locking points. Small details often reveal larger compatibility problems.

How to Choose the Best Attachments for Excavators

Matching attachments to excavator size, operating weight, and auxiliary hydraulic flow

Hydraulic flow and excavator operating weight are key factors when selecting attachments. Mini excavators are generally suited to buckets, augers, breakers, and compact grapples with lower flow requirements. Mid-size and large excavators can support higher-flow breakers, mulchers, crushers, and heavy-duty hammers. Always compare the attachment's required flow, pressure, weight, and mounting dimensions with the excavator's specifications before use.

Assessing Job Requirements, Ground Conditions, and Materials

Choosing an excavator attachment starts with the job, not the machine. Define the digging depth, working space, production target, and material before selecting equipment. A narrow trench bucket suits utility work, while a wider bucket can improve output in stable soil. Bigger is not always better.

Ground conditions often change the decision. Soft clay may require a wider bucket with reduced digging resistance. Compact gravel, fractured rock, or frozen ground may need a breaker or reinforced bucket. Wet soil can cling to smooth surfaces and slow dumping.

I once underestimated this problem on a muddy site; the attachment performed well, but cleaning delays reduced productivity. That mistake still influences my planning.

Material weight and behavior also matter. Check the excavator’s rated lift capacity, hydraulic flow, pressure, and attachment weight against the manufacturer’s specifications. Dense stone creates different stresses than loose sand.

For demolition, verify impact energy and structural protection. For grading, prioritize visibility, control, and a suitable cutting edge. Operators should inspect pins, hoses, teeth, and quick couplers before each shift. Small wear can become expensive downtime.

Site access deserves equal attention. A long-reach attachment may improve access but reduce lifting strength and stability. A compact tool can work safely in restricted spaces, yet it may require more passes. There is no perfect attachment choice. Recheck the soil, material, and daily workload as conditions change.

Checking Compatibility, Hydraulic Needs, and Installation

Choosing an excavator attachment starts with fit, not appearance. Measure the coupler, pin diameter, mounting width, and machine lifting capacity. A bucket can look suitable yet leave dangerous side movement. Check the excavator’s operating manual and the attachment’s certified specifications. Do not rely on a seller’s rough estimate. On a recent site inspection, I found a hydraulic breaker that matched the weight range but not the mounting pins.

Hydraulic requirements deserve closer attention. Compare required flow and pressure with the machine’s auxiliary circuit. Too little flow reduces impact energy or cutting speed. Too much flow can overheat oil, damage seals, and shorten component life. Confirm hose size, coupler type, return-line needs, and case-drain requirements. Keep the numbers visible. A pressure gauge and flow test are more reliable than sound alone. Check oil temperature after sustained operation, not immediately after startup. I sometimes see operators adjust pressure before checking the relief setting. That shortcut is easy to regret.

Installation should follow a controlled, practical sequence. Park on firm ground, lower the attachment, release hydraulic pressure, and inspect locking points. Use rated pins and retainers; never improvise with damaged bolts or loose steel. After connection, cycle the attachment slowly and watch for leaks, twisting, or unusual vibration. A second person can confirm that the lock indicator is fully engaged. It seems minor. Yet many failures begin with one missed latch. Record the attachment settings and inspection date for the next operator. If the fit remains uncertain, stop and obtain a qualified technical assessment before digging.

Comparing Performance, Safety, Maintenance, and Operating Costs

How to Choose the Best Attachments for Excavators

Choosing an excavator attachment starts with the work, not the catalog. A breaker may deliver strong impact, but it can increase vibration, noise, and hydraulic heat. A bucket with the correct width often improves productivity more than a larger attachment. Match the attachment’s flow and pressure requirements with the excavator’s specifications. Otherwise, performance may look impressive while the pump suffers quietly. Fit matters. Field experience shows that balanced tools reduce wasted movements and operator fatigue. I still see teams choosing maximum capacity when controlled power would produce better results.

Safety deserves equal attention. Check the attachment’s locking system, mounting points, hoses, and visible cracks before each shift. Confirm the load chart when lifting, even for short movements. Keep people outside the swing area, and never rely on hydraulic pressure to hold a suspended load. Small leaks matter. A clean inspection record also helps identify repeated failures and supports safer decisions.

Tips: Compare daily output, fuel use, maintenance hours, and replacement parts before buying. Grease pivot points according to the service schedule, and inspect cutting edges or teeth before they damage the adapter. Use the correct hydraulic settings and allow the system to warm up in cold weather. A cheaper attachment may become expensive through downtime. However, cost estimates are never perfect; soil, operator habits, and transport distance can change the result. Record actual hours and repairs, then revise the choice after several projects.

How to Choose the Best Attachments for Excavators - Comparing Performance, Safety, Maintenance, and Operating Costs

Attachment Type Best Applications Typical Performance Productivity Rating
(1–5)
Key Safety Considerations Routine Maintenance Typical Purchase Cost
(USD)
Operating Cost
(USD/hour)
Overall Value
General-Purpose Bucket Trenching, loading, grading, soil handling, and general excavation. High versatility; commonly available in approximately 0.8–1.5 m³ capacities for medium excavators. ★★★★★
5/5
Check bucket pins, teeth, and retaining hardware before operation. Avoid overloading and maintain a stable working platform. Grease pins daily or according to the service schedule; inspect teeth and cutting edges every shift. $3,000–$12,000 $12–$24 Excellent
Heavy-Duty Rock Bucket Hard-packed soil, crushed rock, quarry work, and abrasive materials. Higher penetration and wear resistance than standard buckets; generally lower capacity due to heavier construction. ★★★★☆
4/5
Use only within the excavator’s rated lifting and hydraulic limits. Inspect welds, side cutters, and wear plates for cracking. Daily greasing; frequent inspection of teeth, adapters, side cutters, and wear strips. Replace worn components before structural damage occurs. $7,000–$22,000 $18–$34 Very Good
Hydraulic Breaker Demolition, concrete removal, trenching in rock, and breaking oversized material. High impact energy; effective output depends on rock strength, tool diameter, carrier flow, and operator technique. ★★★★☆
4/5
Use hearing, eye, face, and vibration protection. Keep bystanders outside the exclusion zone and never use the tool for lifting. Inspect and grease the tool at short intervals, often every 2–4 operating hours. Check hoses, tool retainers, bushings, and accumulator pressure. $12,000–$45,000 $32–$65 Good
Hydraulic Thumb Handling logs, rocks, demolition debris, pipe, and irregular loads. Improves material control and sorting; productivity gains are greatest when frequent repositioning is required. ★★★★☆
4/5
Confirm the load is secure before slewing. Keep the load low, avoid side loading, and do not exceed the attachment or excavator lifting limit. Grease pivot points daily; inspect cylinders, pins, bushings, hoses, and mounting brackets for wear or leakage. $6,000–$20,000 $14–$28 Very Good
Hydraulic Grapple Waste sorting, demolition cleanup, recycling, brush removal, and material handling. Fast gripping and sorting; performance varies with jaw opening, rotation system, and material density. ★★★★☆
4/5
Inspect jaw locking and hydraulic functions before handling material. Use guarding where required and maintain a clear drop zone. Grease pivots daily; inspect jaw tips, cylinder pins, hoses, rotator, and structural welds. $10,000–$35,000 $20–$42 Good
Tiltrotator Precision grading, utility trenching, landscaping, and work in confined areas. Provides up to approximately 45° of tilt in many configurations and significantly reduces machine repositioning. ★★★★☆
4/5
Verify the locking system before every use. Follow rated-load charts because the added weight and offset can reduce lifting capacity. Daily lubrication is commonly required; inspect coupler locks, hoses, sensors, pins, and attachment interfaces. $25,000–$65,000 $18–$38 Very Good
Auger Drive Fence posts, foundations, soil sampling, sign installation, and utility work. Efficient in suitable soils; torque, bit diameter, and ground conditions determine drilling speed. ★★★☆☆
3/5
Keep personnel away from the rotating flighting. Stop rotation before clearing spoil or changing bits, and check underground utility information. Inspect planetary oil, drive shaft, mounting pins, hoses, and flighting. Replace damaged teeth and pilots promptly. $8,000–$28,000 $16–$35 Good
Compaction Plate Trench backfill, road shoulders, foundations, and confined-area soil compaction. Delivers consistent compaction where a ride-on roller cannot access; results depend on soil type, moisture, and passes. ★★★☆☆
3/5
Keep workers clear of vibration and unstable edges. Confirm the plate is securely attached and avoid compacting near unsupported trench walls. Inspect mounting brackets, vibration housing, hoses, bolts, and isolation components. Check lubrication and fastener torque regularly. $9,000–$24,000 $15–$30 Good
Hydraulic Shear Structural steel cutting, vehicle processing, industrial demolition, and heavy scrap reduction. High cutting force; cycle time depends on material thickness, jaw design, rotation, and excavator hydraulic power. ★★★★☆
4/5
Use a controlled demolition plan, exclusion zone, and material assessment. Never cut pressurized, sealed, or unidentified containers. Grease pivots daily; inspect blades, jaw alignment, cylinder pins, hoses, and mounting structure. Blade adjustment may be required. $35,000–$110,000 $42–$85 Good
Flail Mower Vegetation management, right-of-way clearing, drainage corridors, and slope maintenance. Effective for grass, brush, and small woody growth; output depends strongly on vegetation density and terrain. ★★★☆☆
3/5
Use protective guarding and a wide debris exclusion zone. Avoid people, glass, wire, and hidden metal; inspect rotor guards before work. Clean debris after each shift; inspect flails, rotor bearings, belts, hoses, guards, and bolts. Replace damaged cutting elements in matched sets where required. $18,000–$55,000 $25–$52 Moderate

Comparison basis: The figures are representative planning ranges for a medium excavator of approximately 20–25 metric tonnes operating in North America. Purchase costs exclude the excavator, quick coupler, delivery, and taxes. Operating costs include typical attachment-related wear, service, and energy demand but exclude the operator, financing, and general machine ownership. Actual results vary with hydraulic flow, carrier size, material conditions, utilization, local labor rates, and maintenance practices. Always confirm manufacturer load charts, hydraulic requirements, guarding, and local safety regulations before use.